Minolta EP1030 User Manual Page 2
- Page / 16
- Table of contents
- BOOKMARKS
- Rebuilding Instructions 1
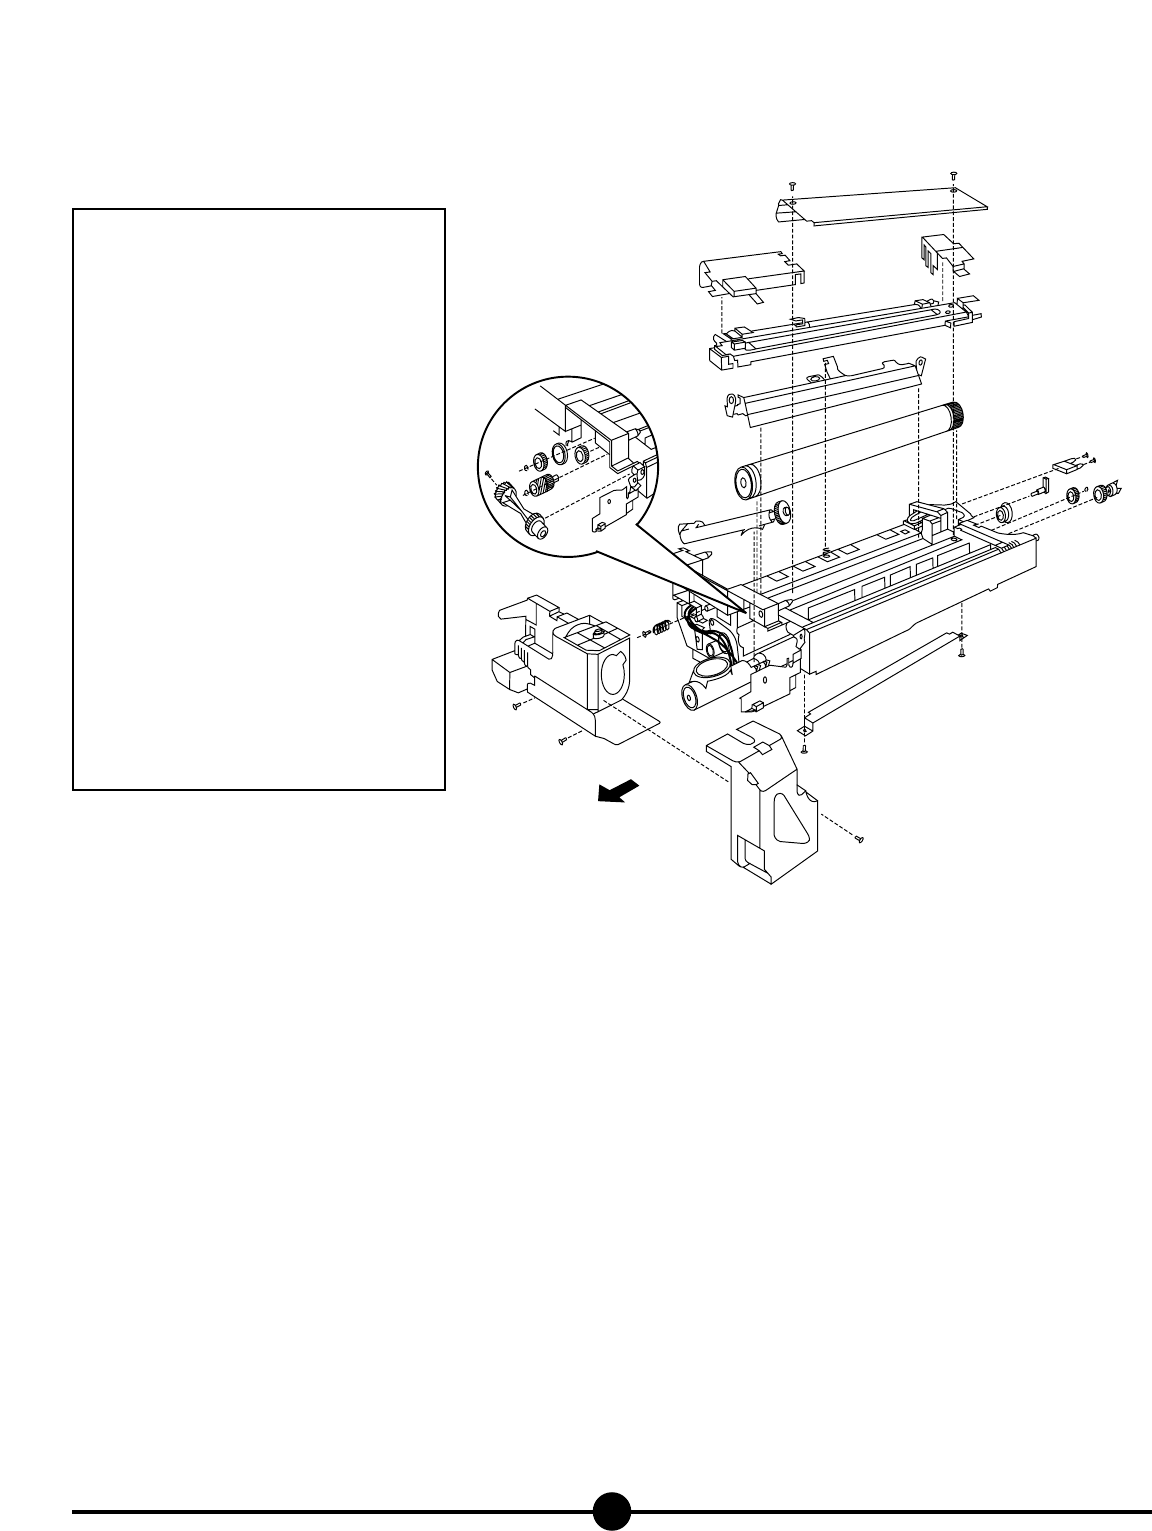
- 1031F Imaging Unit 2
- Replacing the Fuse 3
- Reassembly 3
- Installation 3
- PARTE DELANTERA 4
- Desarmado 5
- Reemplazo del fusible 5
- Instalación 6
- Zerlegen 7
- Die Sicherung ersetzen 8
- Zusammenbau 9
- Démontage 11
- Remplacement du fusible 11
- Remontage 12
- Mise en place 12
- Preparazione dello smontaggio 13
- Smontaggio 14
- Sostituzione del fusibile 14
- Installazione 15
- Riassemblaggio 15
Related products and manuals for Copiers Minolta EP1030
 (254 pages)
(131 pages)
(376 pages)
(6 pages)
(106 pages)
(90 pages)
(486 pages)
(197 pages)
(6 pages)
(311 pages)
(11 pages)
(342 pages)
(22 pages)
(105 pages)
(2 pages)
(8 pages)
(6 pages)
(254 pages)
(131 pages)
(376 pages)
(6 pages)
(106 pages)
(90 pages)
(486 pages)
(197 pages)
(6 pages)
(311 pages)
(11 pages)
(342 pages)
(22 pages)
(105 pages)
(2 pages)
(8 pages)
(6 pages)
© 2020, manymanuals.com. All rights reserved. | 3.680 s |
 Manymanuals.com
 Manymanuals.de
 Manymanuals.fr
 Manymanuals.it
 Manymanuals.pl
 Manymanuals.cz
 Manymanuals.es
 Manymanuals-pt.com
Comments to this Manuals